PyTorch Learning 1
1 Pytorch 环境配置
Anaconda 安装
显卡配置(驱动+CUDA Toolkit)
有序地管理环境
初始环境:base
切换环境使用不同的pytorch版本
1 | |

1 | |
Pytorch安装
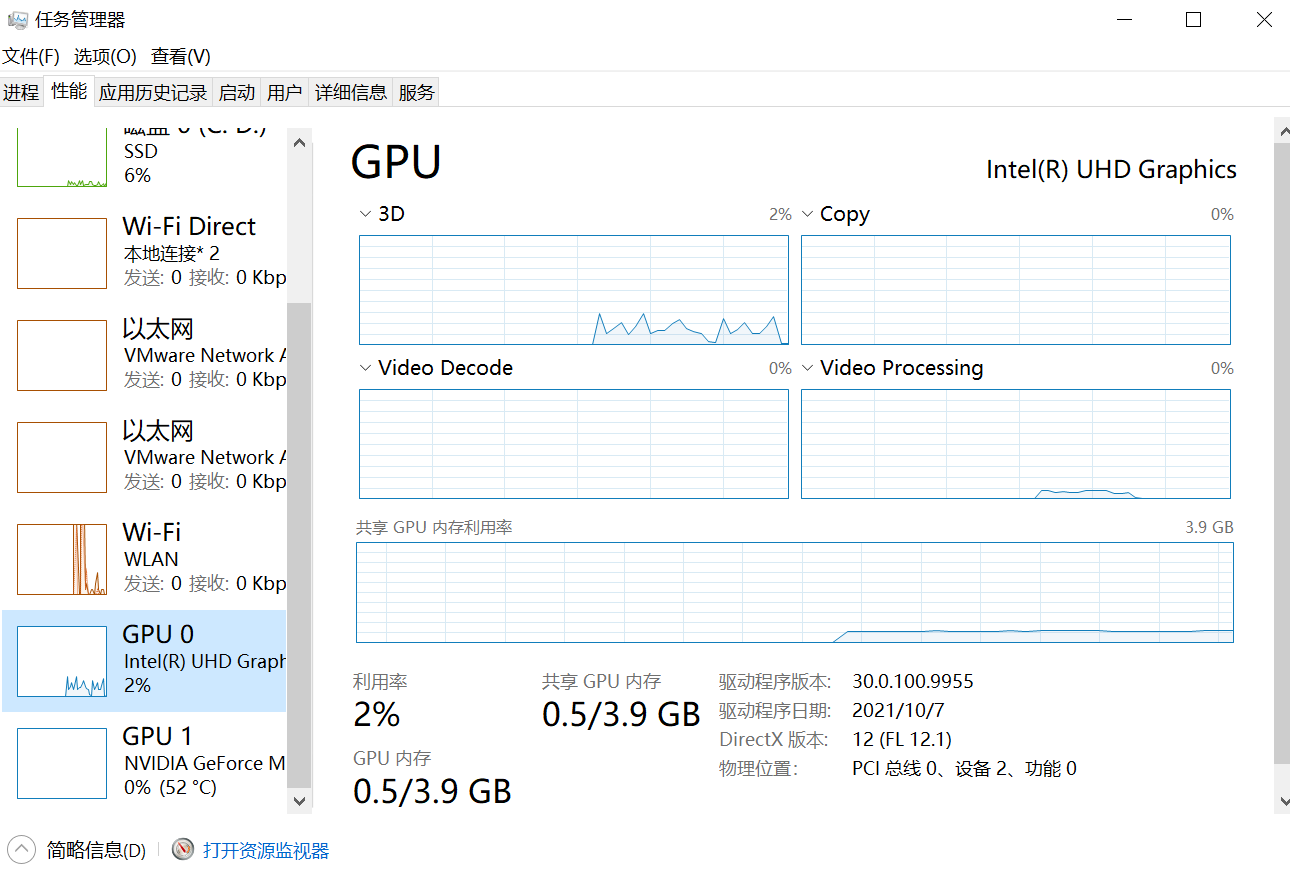
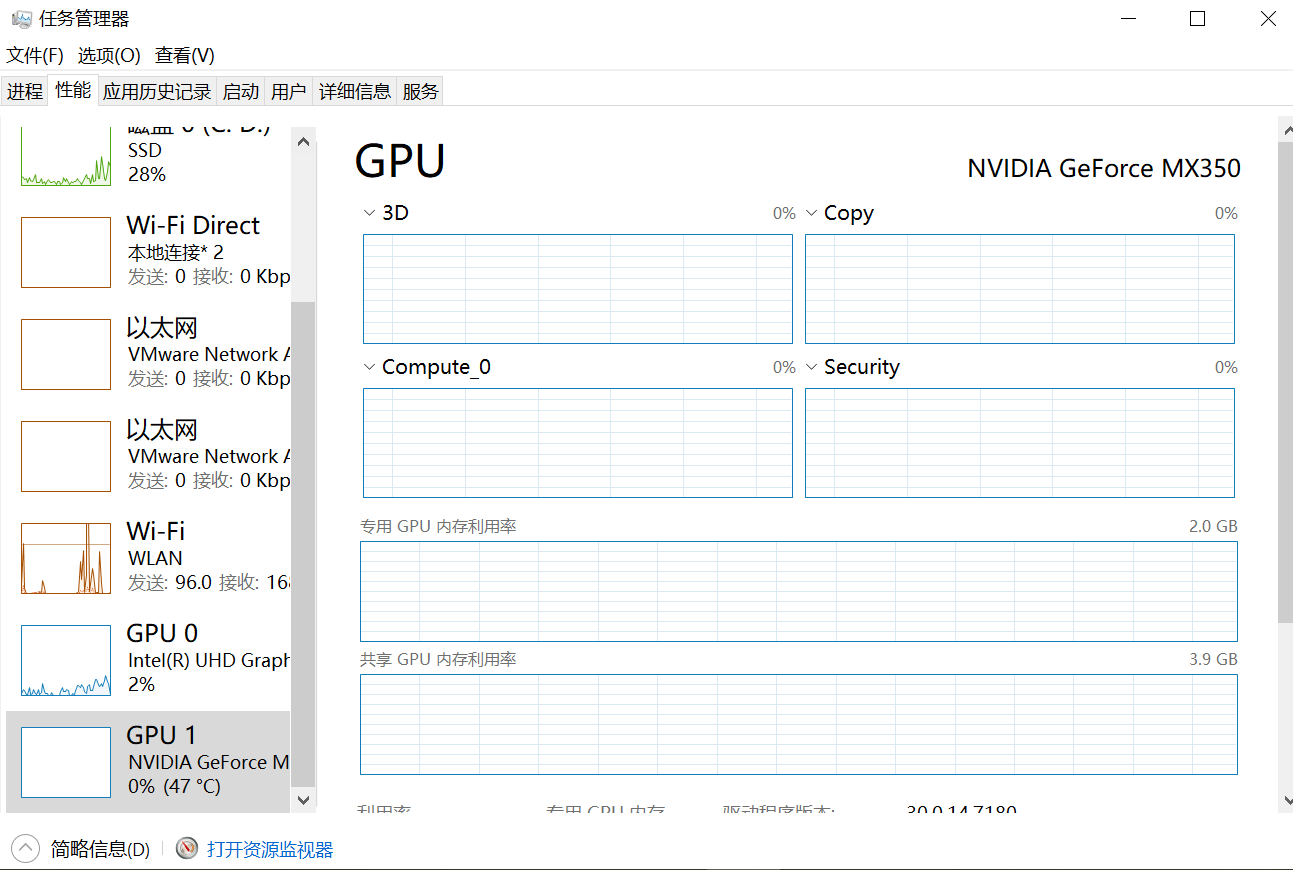
任务管理器查看是否有英伟达显卡
CUDA推荐使用9.2
查看驱动版本
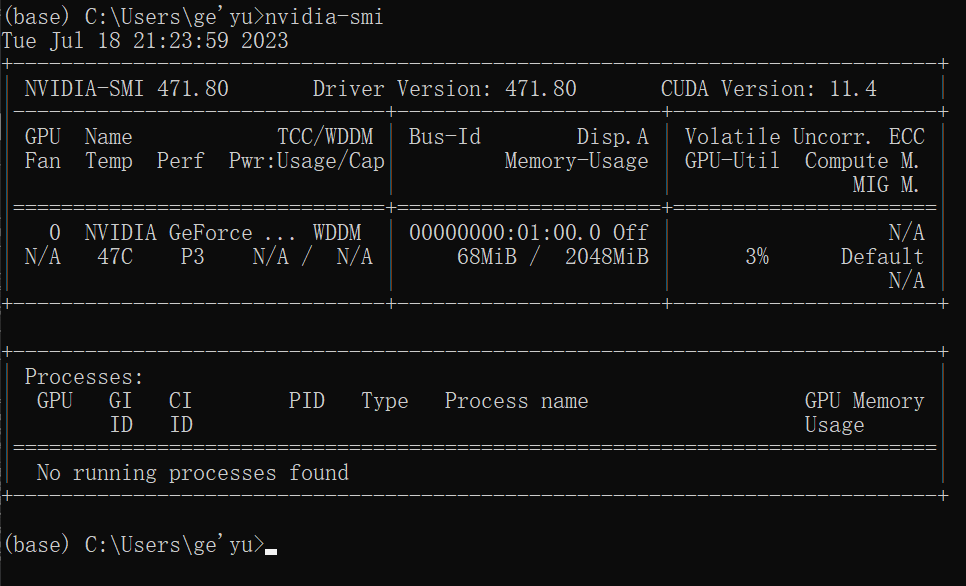
大于396.26可使用
pytorch环境下输入命令,安装9.2版本
1 | |

报错,因为下载速度太慢

清华源可以下载cpu版本:https://blog.csdn.net/zzq060143/article/details/88042075
如果找不到源,需要把命令中的 https 改成 http
下载gpu版本教程:https://www.bilibili.com/read/cv15186754
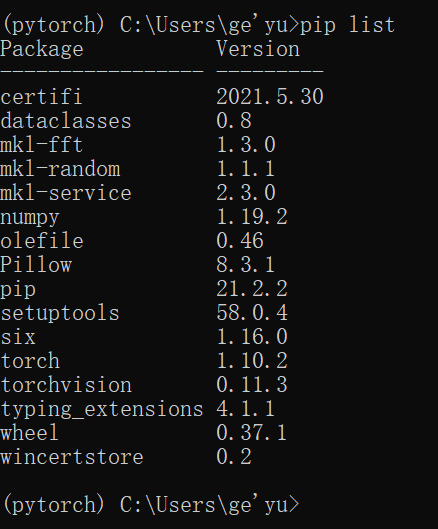
返回时False,因为装的是cpu版本,gpu版本才返回true。cpu版本学习阶段可以使用。

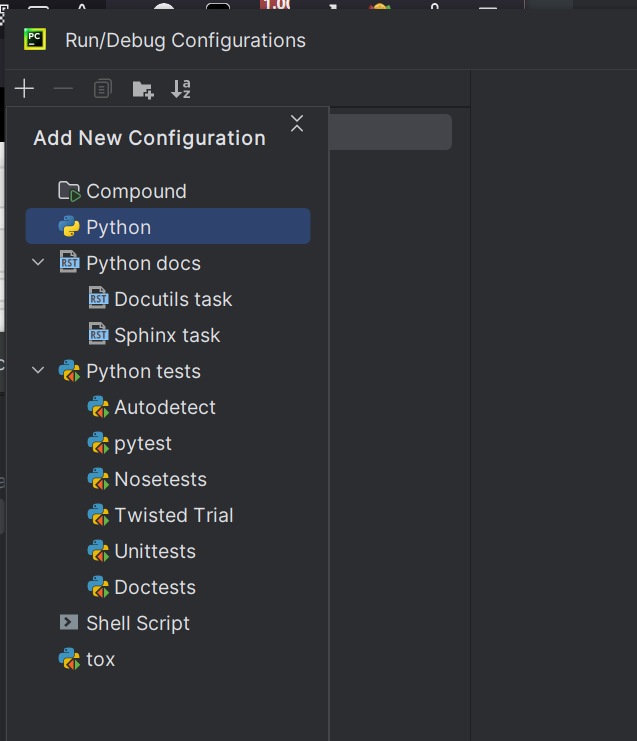
2 Python编辑器的选择
Pytorch安装
官网:https://www.jetbrains.com/pycharm/
下载Community版本
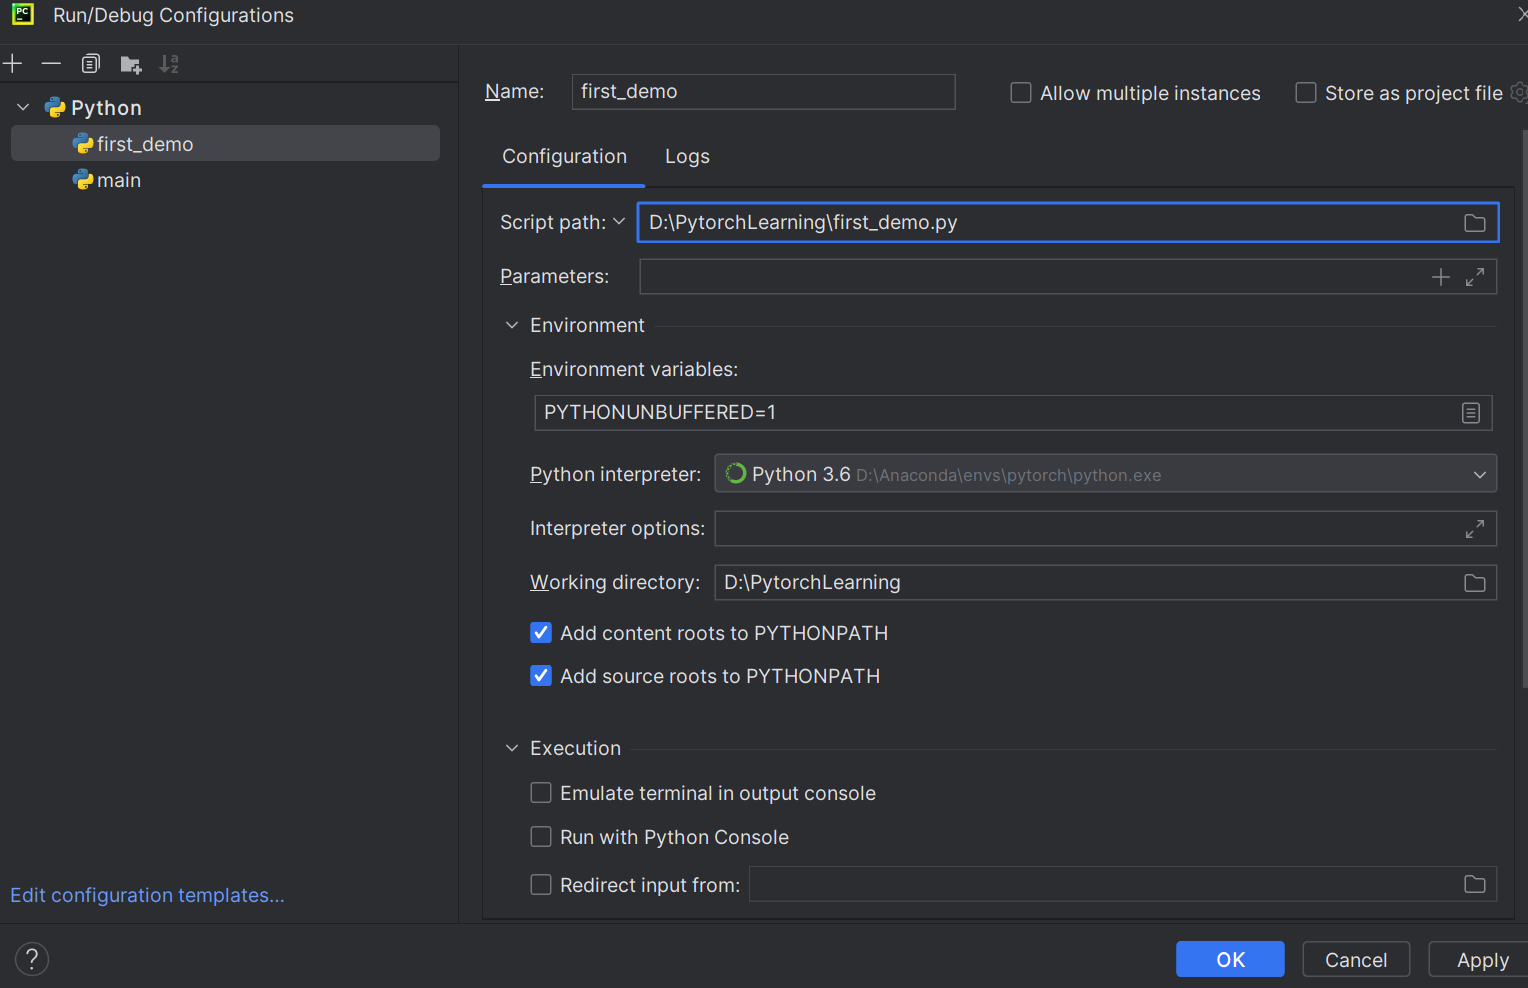
Pytorch 配置
create new project
需要自己配置解释器
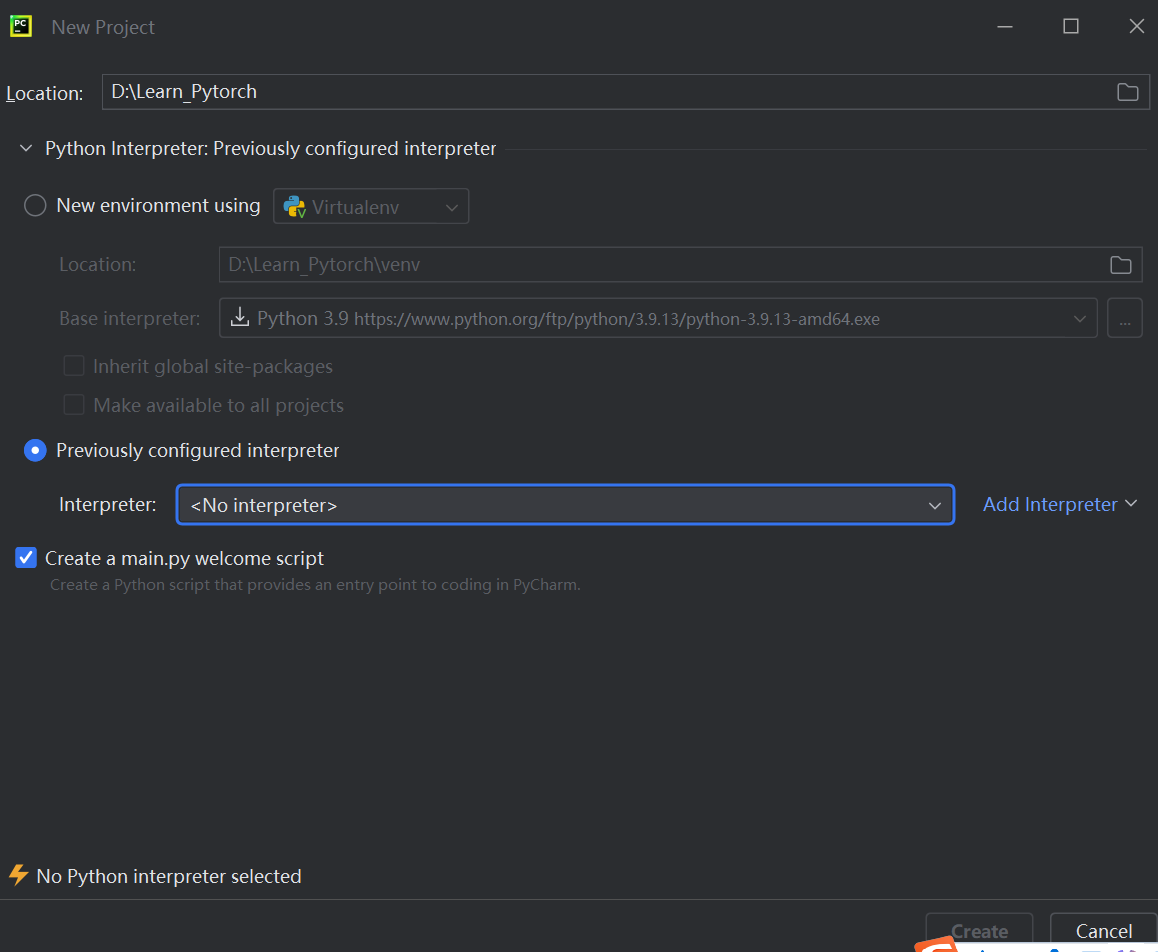
添加python.exe

Conda Environment可能找不到python.exe,选择System Environment添加
https://blog.csdn.net/weixin_43537097/article/details/130931535
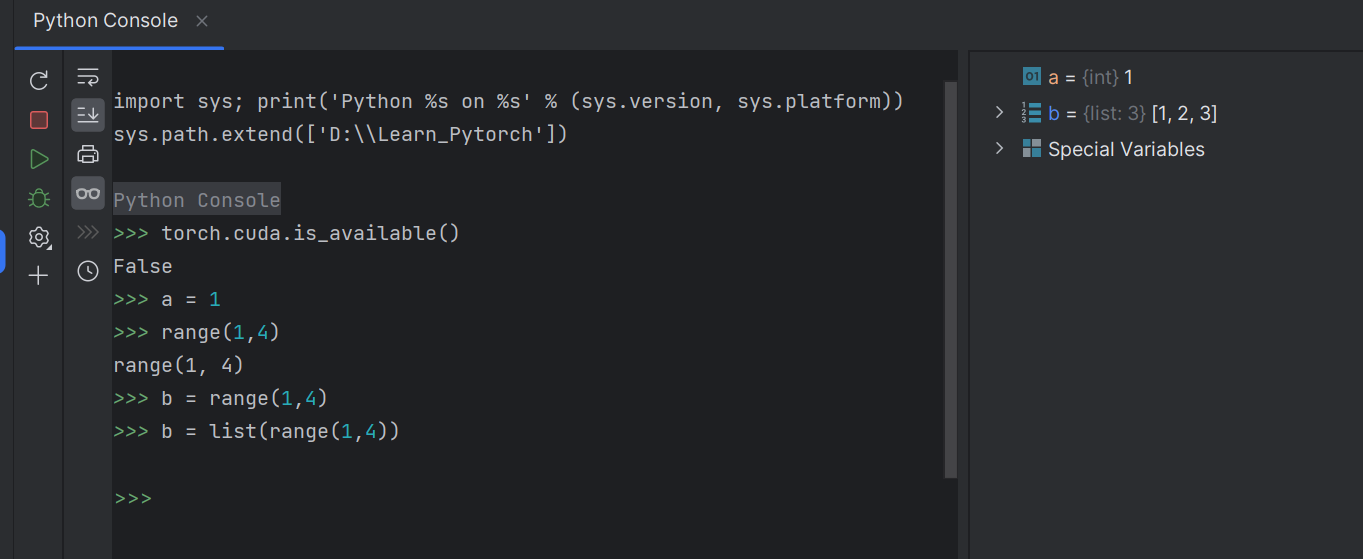
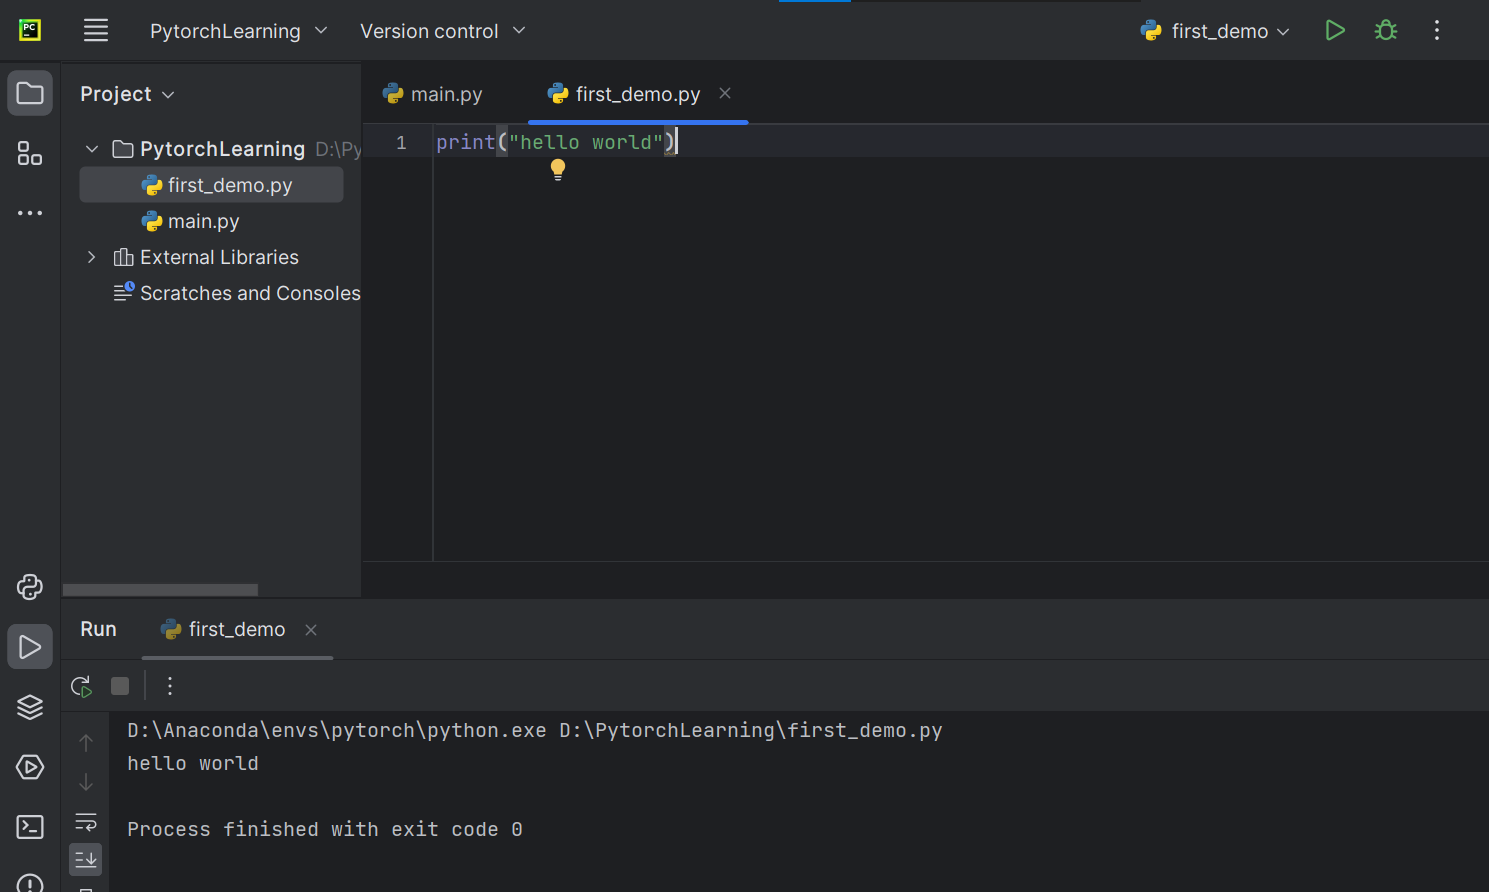
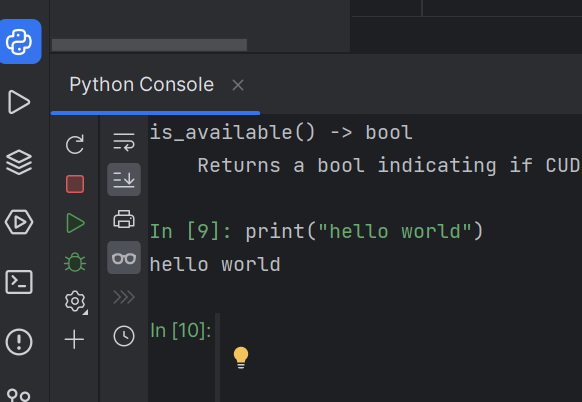
打开Python Consle
import torch
输入torch.cuda.is_available(),CPU版本返回false
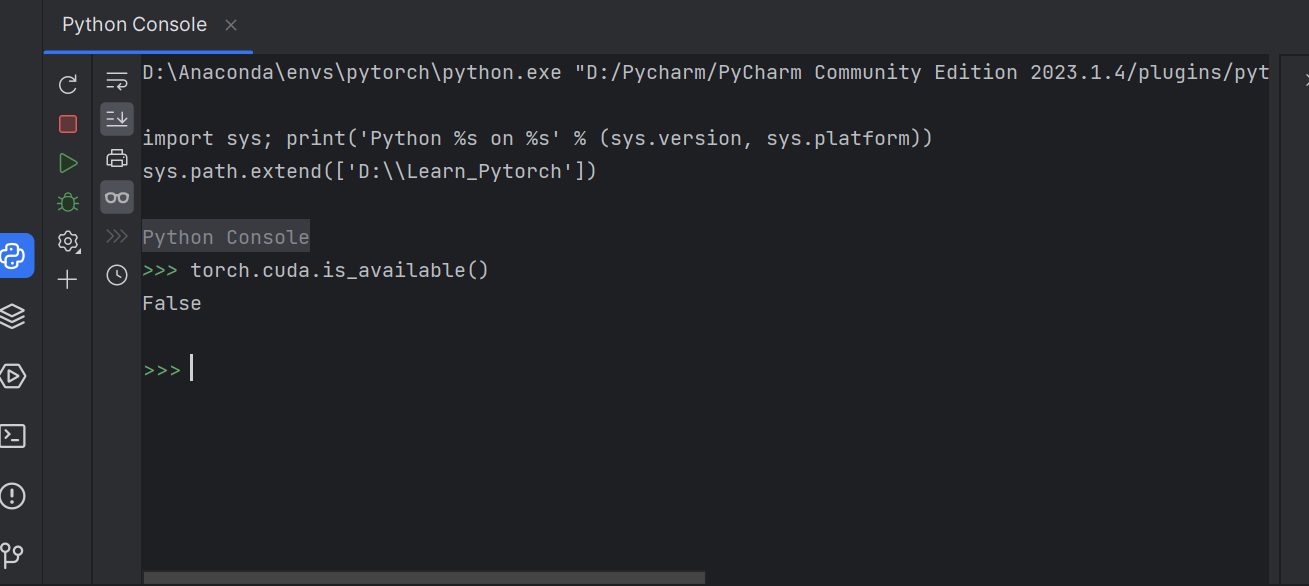
右侧工具栏可实时查看变量
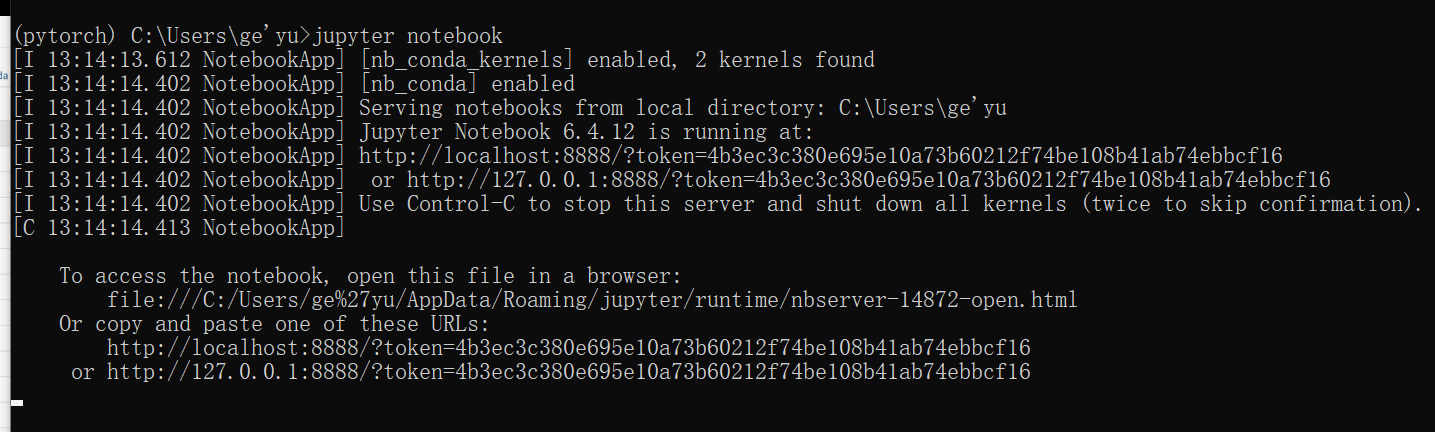
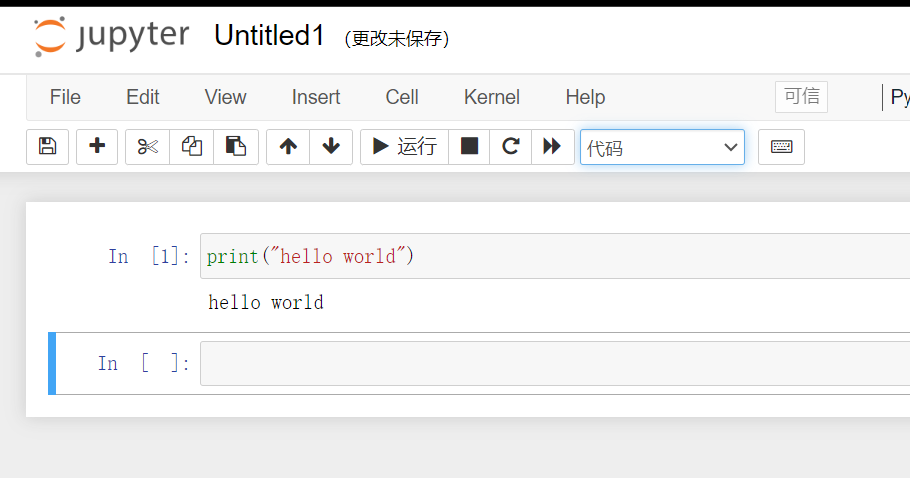
Jupyter 安装
在Pytorch环境中安装Jupyter
在pytorch环境中安装一个包

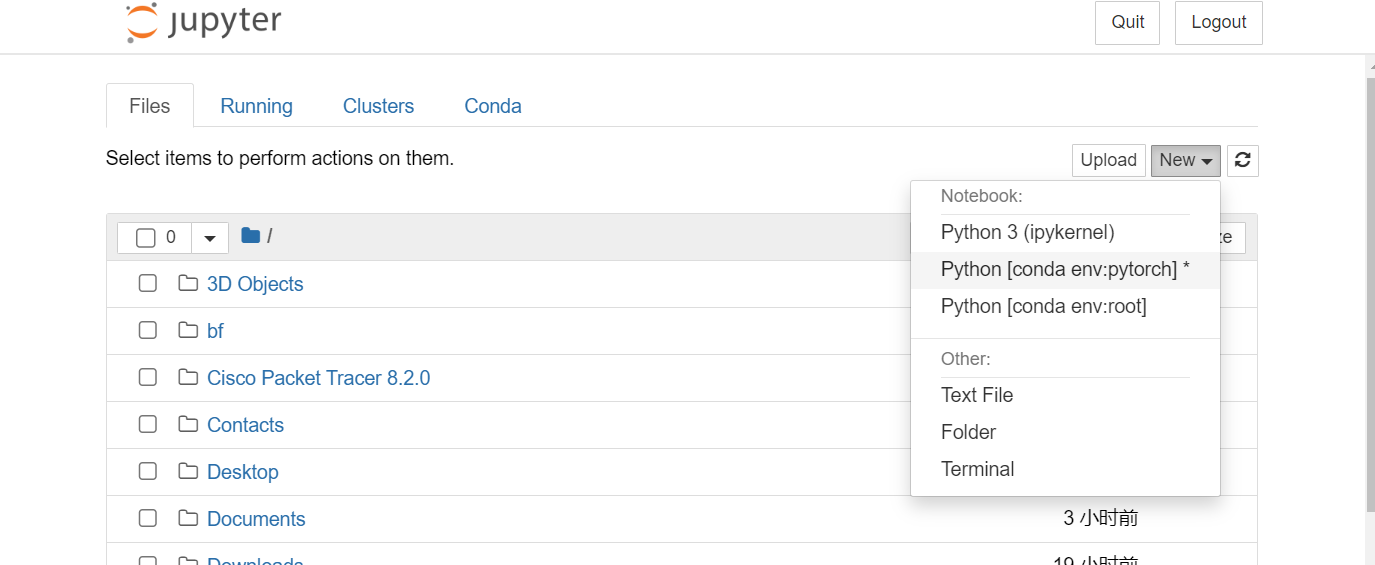
运行Jupyter
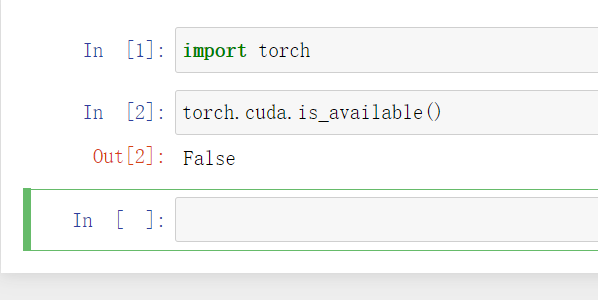
创建代码
shift + enter运行代码块
3 Pytorch学习中的两大法宝函数
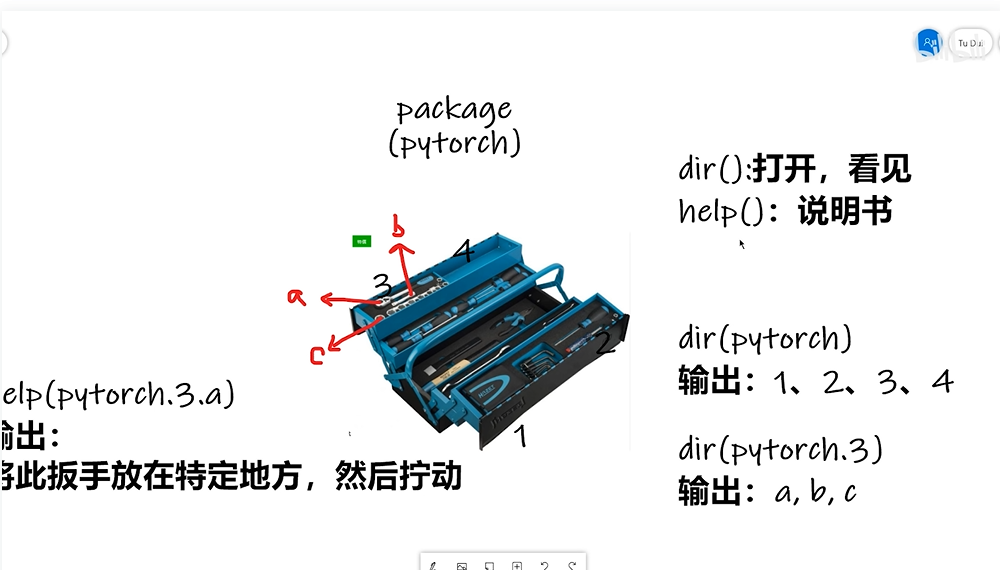
总结:
dir()函数,能让我们知道工具箱以及工具箱中的分隔区有什么东西。
help()函数,能让我们知道每个工具是如何使用的,工具的使用方法。
打开Pycharm,测试这两个工具函数
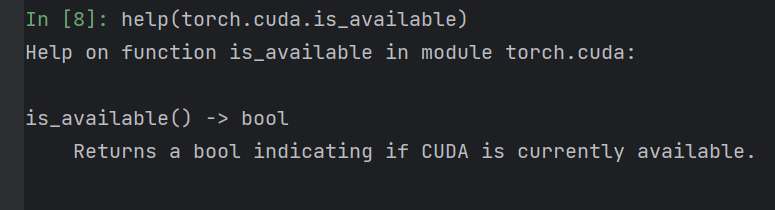
1 | |
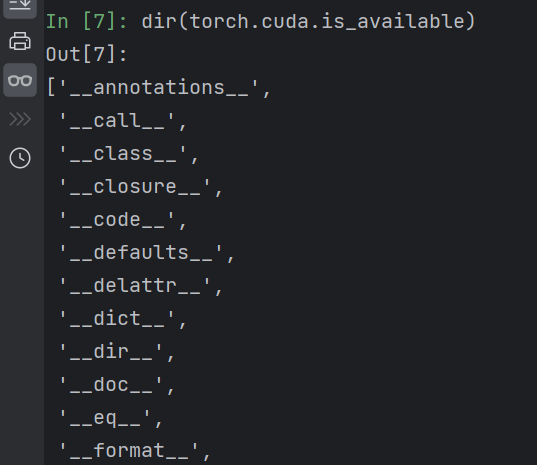
前后有双下划线,表明变量不能修改,说明是函数,不是分割区
dir和help里面函数后面的括号记得去掉
1 | |
4 Pycahrm及Jupyter使用对比
在Pycharm中新建项目
在File-Setting中可查看该项目是否有Pytorch环境

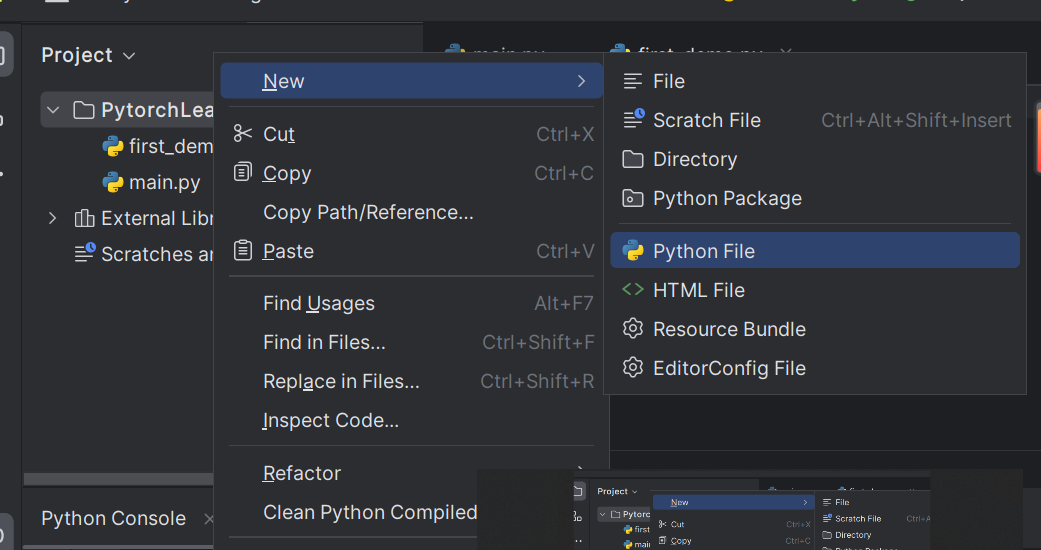
新建Python文件
为Python文件设置Python解释器
运行成功
也可以直接在Python控制台输入语句,直接输出结果
Jupyter新建项目及使用
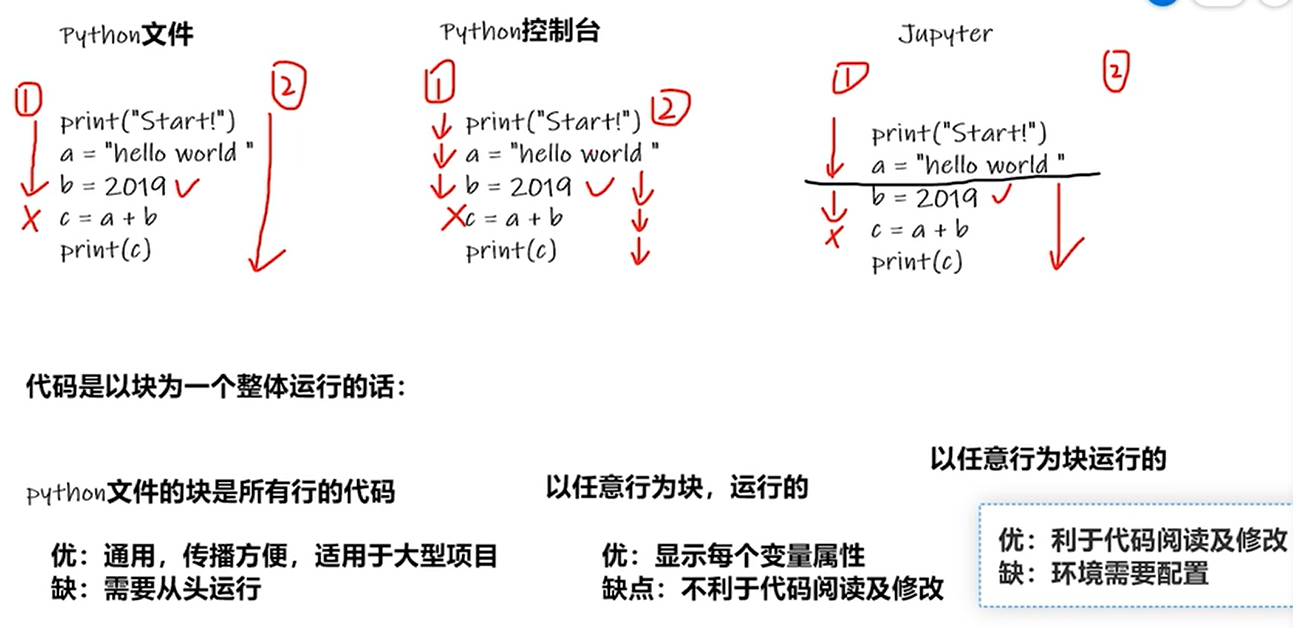
三种代码编辑方式对比
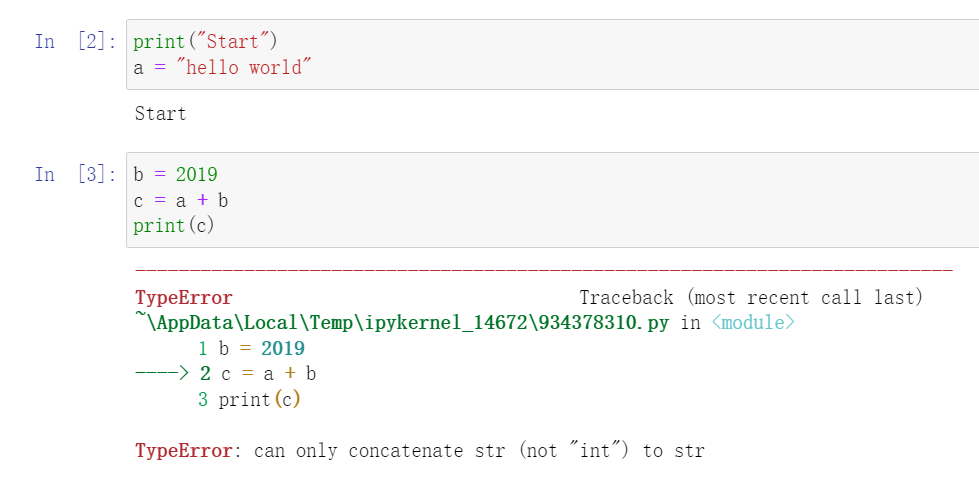
用三种方式运行同一段错误代码
Python文件
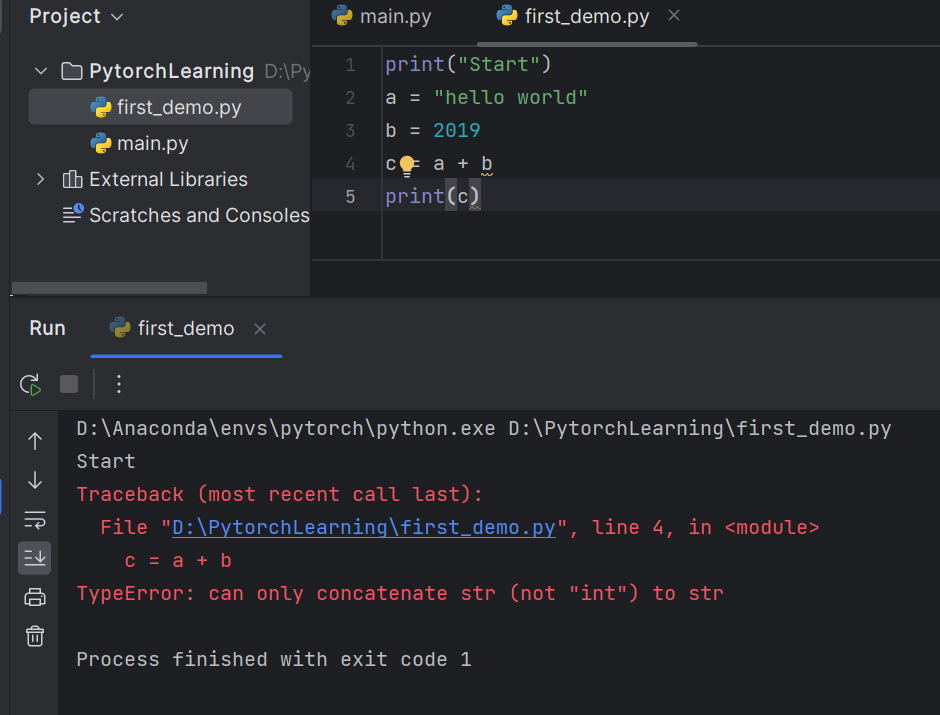
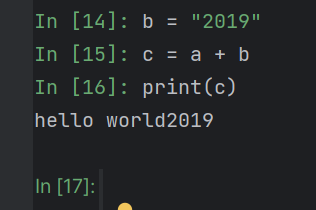
报错,字符串和整型相加不允许
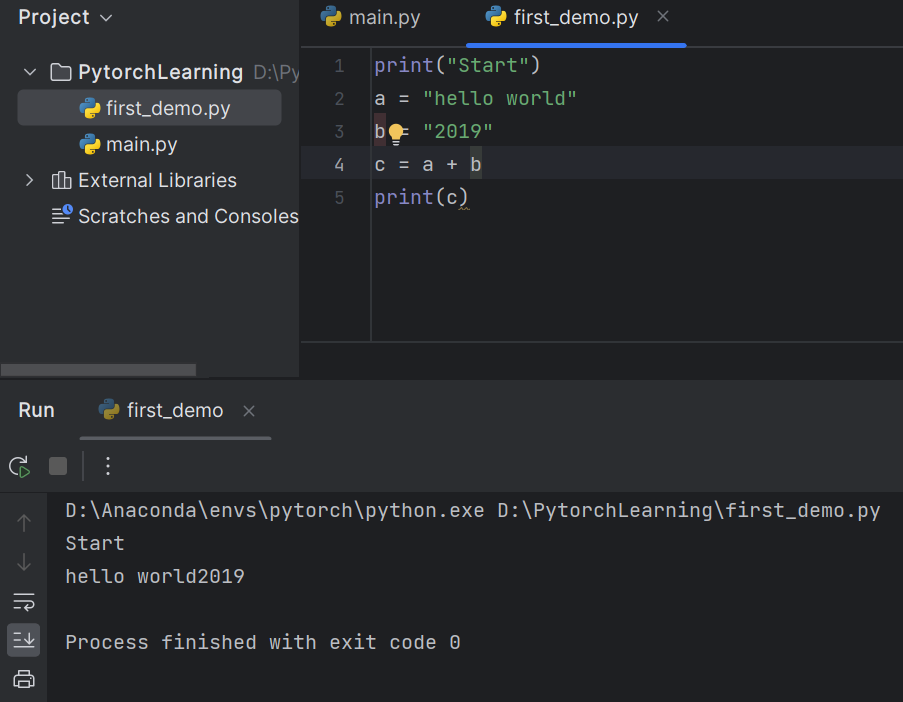
修改b后,运行成功
Python控制台
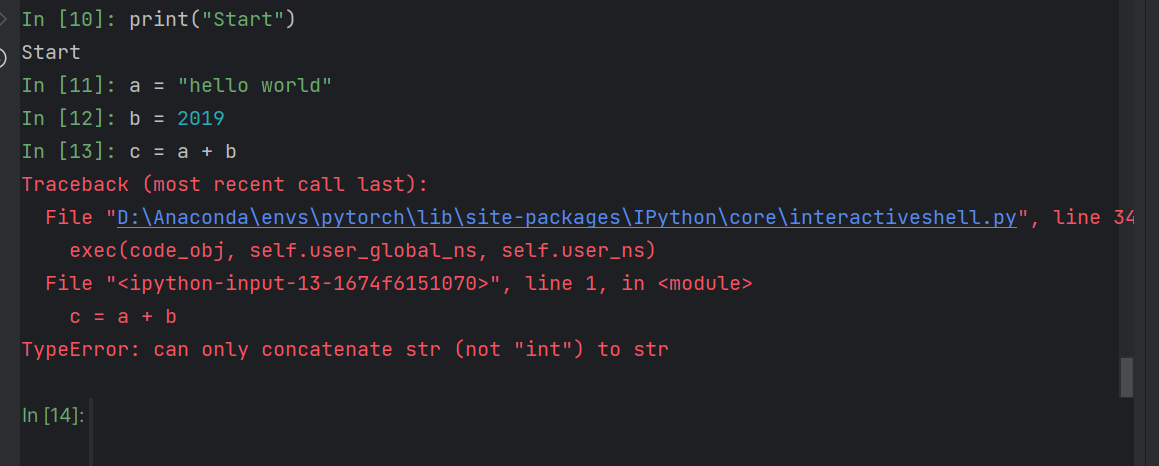
修改b后
如果发生错误,代码可读性下降
shift+enter可以以多行为一个块运行

Jupyter
修改b后

·总结
5 Pytorch加载数据初认识
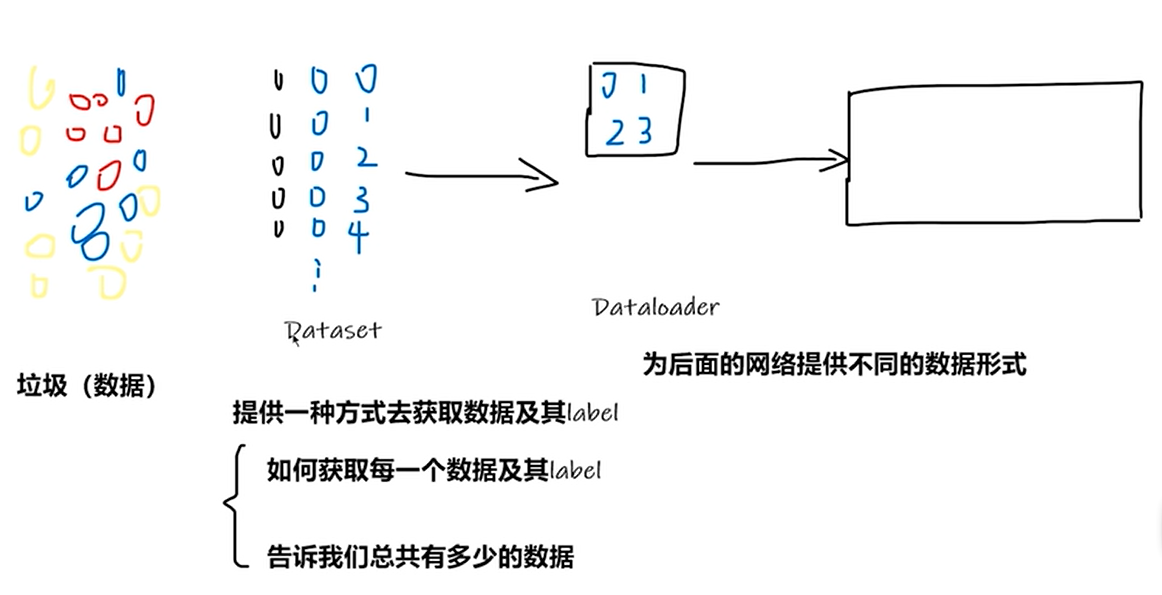
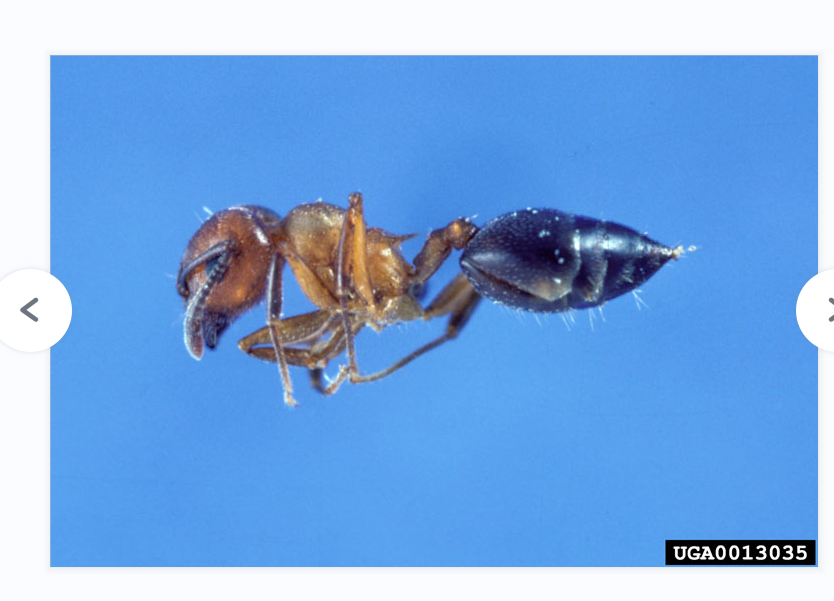
下载蚂蚁/蜜蜂数据集
创建read_data.py文件
1 | |
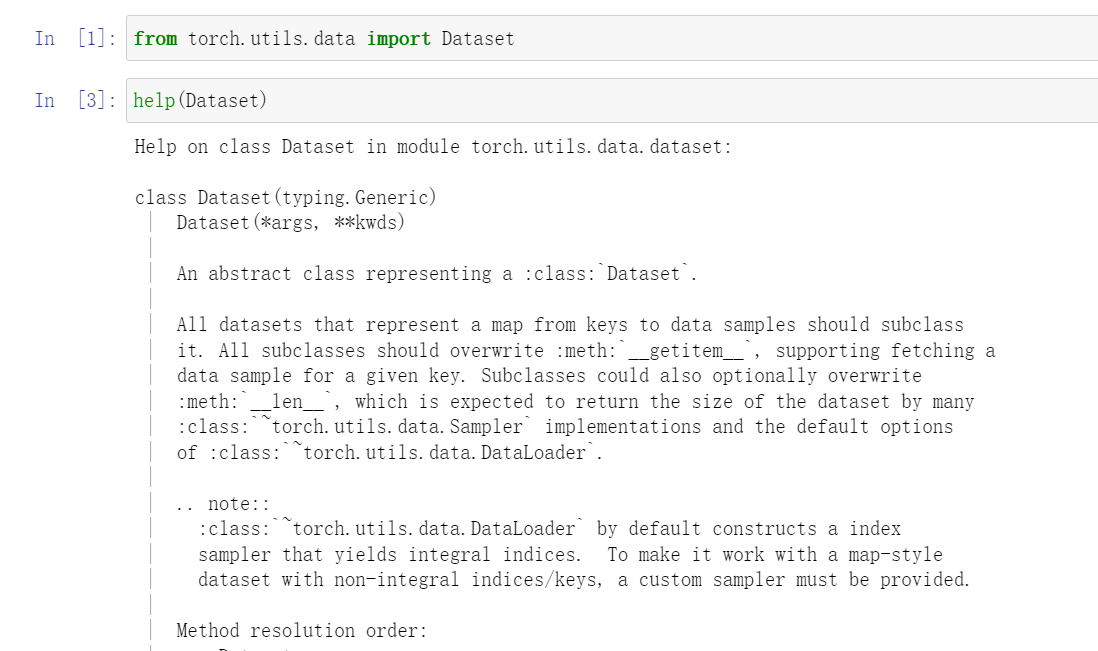
Jupyter中可查看Dateset内的函数
6 Dataset类代码实战
第一次打开终端报错解决:https://blog.csdn.net/qq_33405617/article/details/119894883
导入Image
1 | |
将 “蚂蚁/蜜蜂” 数据集复制到项目中
Python控制台中读取数据
1 | |
复制图片绝对路径,\改成\表示转义
1 | |

1 | |

1 | |
1 | |
获取图片名称及路径
控制台方式
1 | |
python文件方式
1 | |
数据集长度
1 | |
创建实例
1 | |
控制台运行
对象中包含init中的所有变量
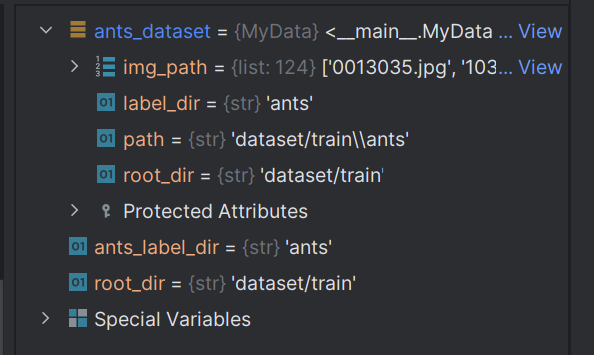
1 | |
同时有蚂蚁和蜜蜂数据集
1 | |
两个数据集集合
1 | |
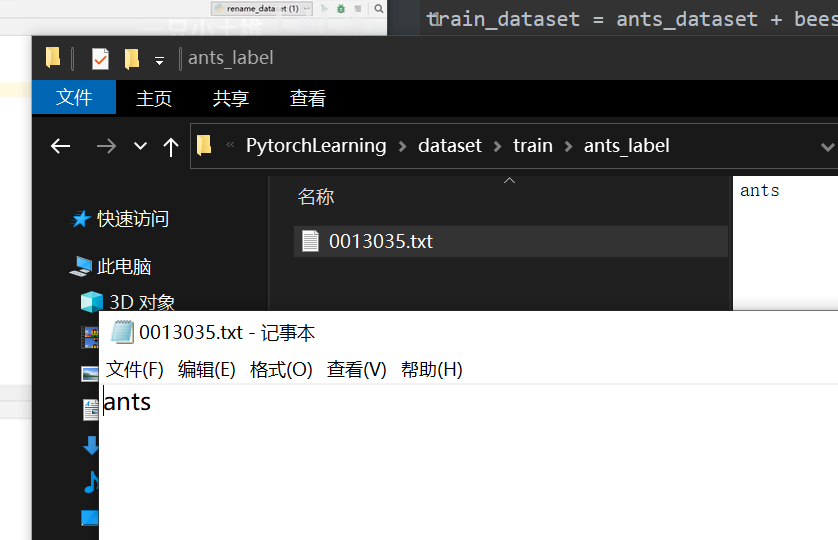
txt标签方式
修改数据集文件名,添加标签文件夹
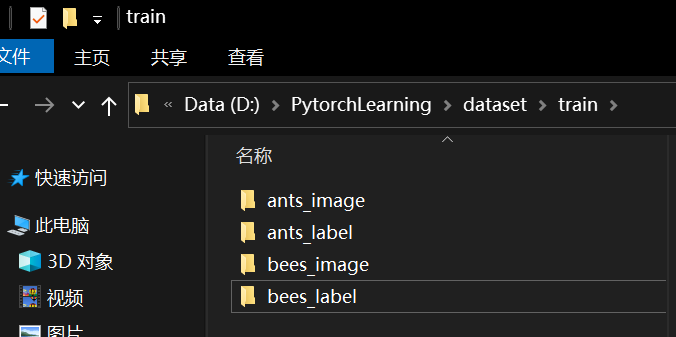
添加标签
标签txt的名称与图片名称一致,txt内容为标签值